Contact Us
Tel:
(+86)021-56883100
E-mail:
shmss@mss-tech.cn
Address:
Room 519, Building 3, Jufeng Plaza, 697-3 Lingshi Road, Jing’an District, Shanghai
Wechat:
SHMSS_
Whats App:
+86 17362163207
Platform URL:
https://shanghaimss.en.made-in-china.com
4K60fps HD series camera(MSS-C-UE-5LI)
- Commodity name: 4K60fps HD series camera(MSS-C-UE-5LI)
- Description
-
Welcome to Shanghai Mengsheng Sheng International Trade
~~~~~~~~~~~~~~~~~~~~~~~~~~~~~~~~~~~~~~~~~~~~~~~~~~~~~~~~~~~~~~~~~~~~~~~~~~~~~~~~~~~~~~~~~~~~~~~~~~~~~▍Specification
▍Camera functions
Boot screen
After the camera is connected and powered up (12V 1A power supply), the camera boots up and displays the power-on interface as shown in the following picture: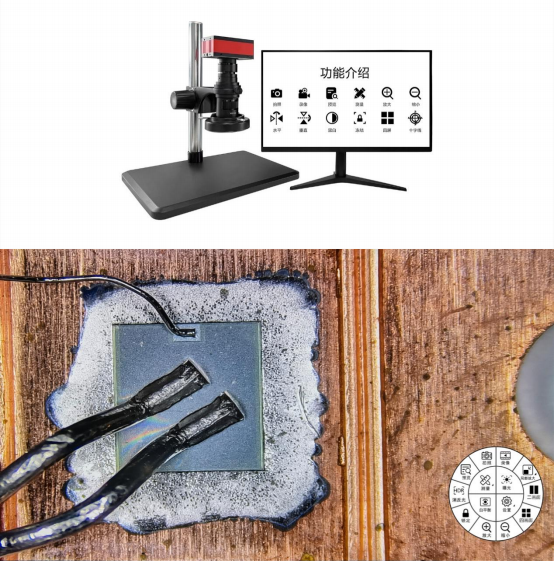
Mouse clicks on each box to achieve the corresponding adjustment:( Photo, Video, Balance, Measurement, Settings)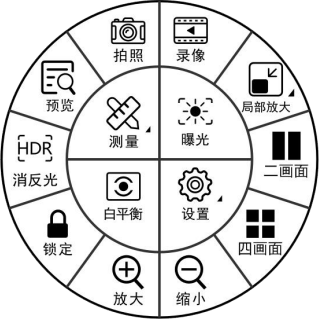
Click the settings box to enter the settings panel as follows: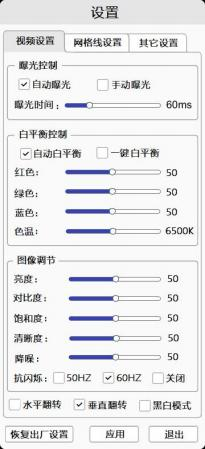
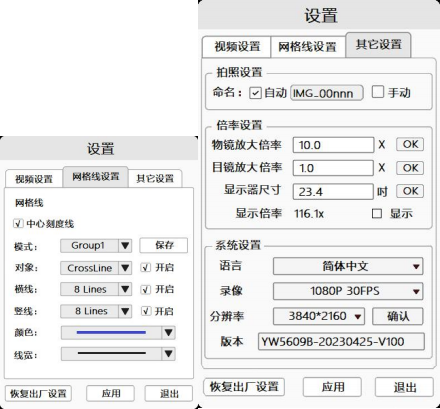
1, Under the video settings bar, you can choose the Exposure mode and White Balance control mode. Drag the corresponding progress bar under this menu to adjust the image parameters, manually adjust the exposure time to set the image brightness. When the light source is stable, you can click the one-click icon to achieve an image white balance calibration action (this function must be aligned with the white standard to do calibration). The camera will no longer do auto white balance after calibration. You can also Set the image flip mode (horizontal flip and vertical flip), image output
mode (color mode and black and white mode) and anti-flicker frequency. Click Apply after setting, and click Restore Factory Settings to restore to the original settings
2,Under the grid line setting column, you can open the center scale by selecting the center scale. You can open or close any of these grid lines according to your needs, or set the color (8 colors are optional) and line width (4 line widths are optional) of each line. You can save 8 groups of grid lines, which is convenient to open the set grid lines quickly during the testing of different products, without setting them again several times. After setting OK, click Apply. Click Restore factory settings to restore to the original settings.
3,Under the Other Settings section, you can set the magnification of the objective and eyepiece. There are three optional languages (English, Simplified Chinese and Traditional Chinese), two optional video settings (1080P 30FPS and 4K 30FPS), two optional resolutions (1920*1080 and 3840*2160). Click Apply after setting, click Restore factory settings to restore to the original settings
Click the measurement box to enter the settings panel as follows:The system offers up to
20 measurement graphs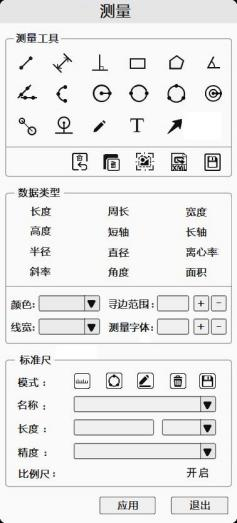
After selecting the corresponding icon according to the measurement needs, you can enter the preview interface and select the corresponding position to achieve the measurement function based on the requirements. The camera system allows you to move, select and delete, delete all, take screenshots, export coordinate parameters etc. of the measuring figures.
Calibration edit:
Before measurement, you need to calibrate the image for the current microscope magnification and image preview resolution, so that the measurement tool can measure accurately. If you press the button to set the calibration, you can choose line calibration and circle calibration, set the name of the calibration in the name column, then go to the preview panel to draw a standard line segment or standard circle according to the actual scale length, fill in the actual length correspondingly, choose the corresponding unit of measurement, and finally confirm on the keyboard.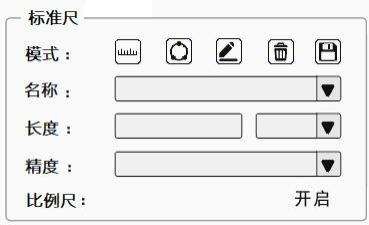
1, Click to enter Calibration setting as follows:
Click one point to confirm the starting point, click again to confirm the end, this figure is: 706.000px
When setting the calibration, you can select the accuracy (0.1, 0.01, 0.001, 0.0001). After confirming the accuracy, click the name of the calibrated calibration to modify it.
2, Click the left mouse button behind the name field, the following box pops up, you can name it After confirming it, press enter, and then press Close to close this dialog box
3, Click to delete the calibration
4,Calibration automatically calculates the ratio based on actual length to pixel length
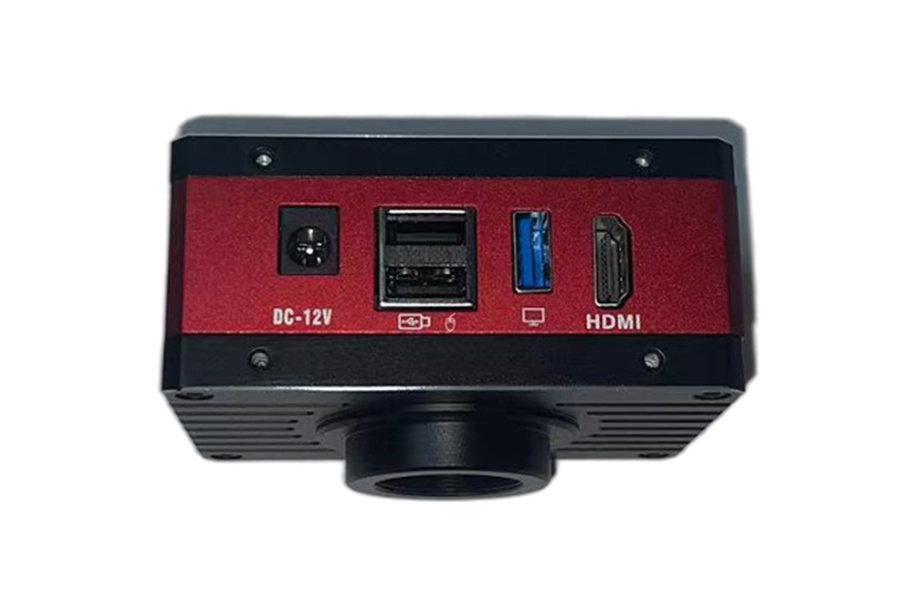
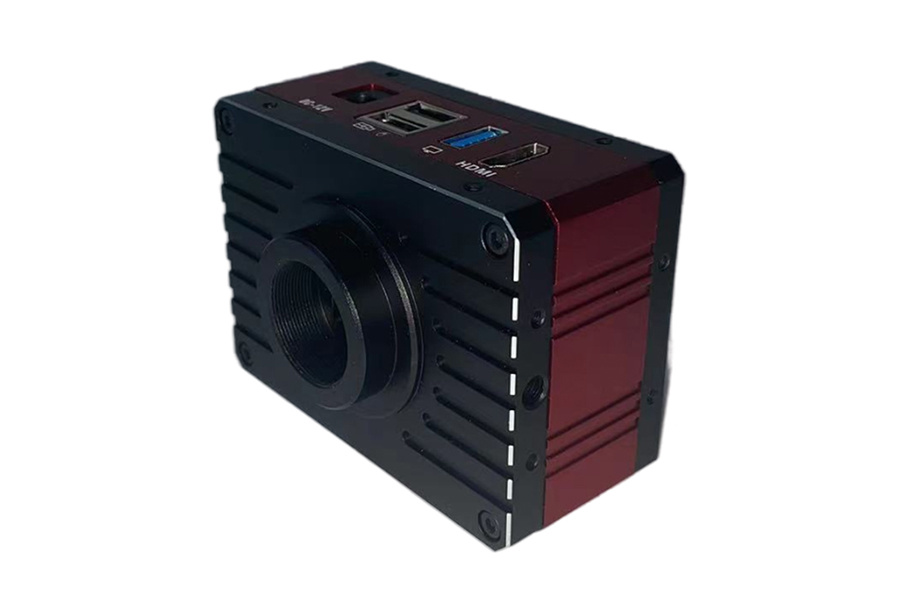
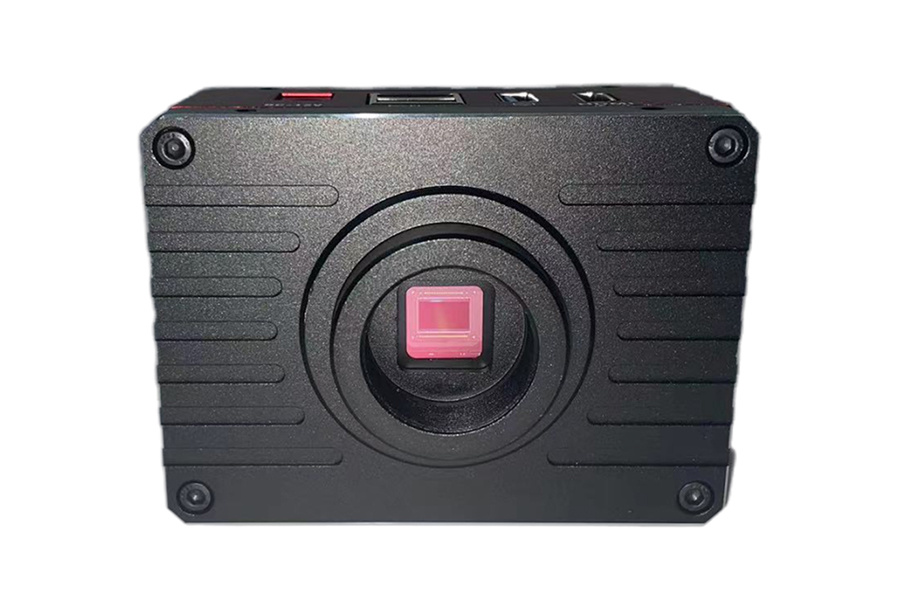
5, Click the open box behind the scale to display the scale. The scale is at the bottom right of the monitor by default, and if the open box is not checked, the scale is not displayed Six views of the camera structure:
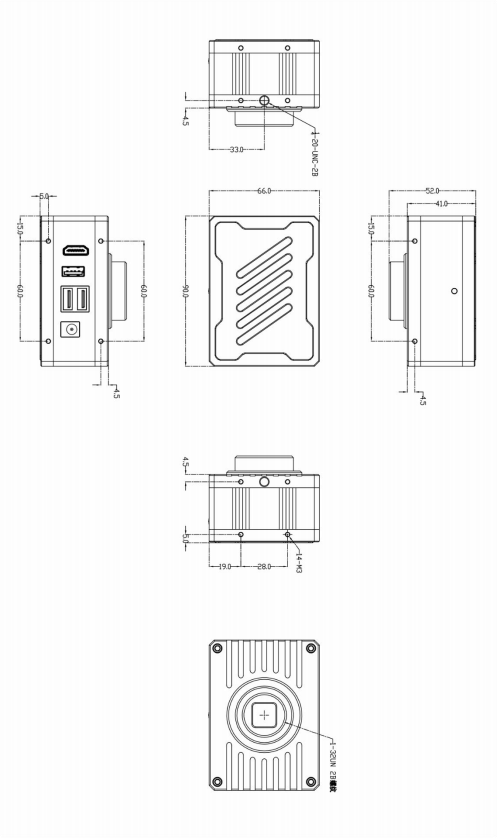 ~~~~~~~~~~~~~~~~~~~~~~~~~~~~~~~~~~~~~~~~~~~~~~~~~~~~~~~~~~~~~~~~~~~~~~~~~~~~~~~~~~~~~~~~~~~~~~~~~~~~~~~Your satisfaction and positive feedback is very significant to us.
Thank you! Have a nice day!
Get A Quote
Note: Please leave your email address, our professionals will contact you as soon as possible!


